Showing posts with label Food Fun News. Show all posts
Can Drinking Water Before Chopping Onions Keep You from Crying? We Tested This and Other Methods

Can Drinking Water Before Chopping Onions Keep You from Crying? We Tested This and Other Methods


From chewing gum to lighting a candle, it's time to figure out which of these myths about onion waterworks are fact and which are fiction.


We all know the feeling. You're slicing into a crisp onion, and suddenly the waterworks come on. As if you were watching the last scene of Titanic and every pet-adoption commercial rolled up in one, tears are streaming down your face. Why do onions make us cry? Onions produce a chemical called syn-propanethial-S-oxide, which is known to trigger tears. When the onion is cut, this chemical sprays into the air, causing even the most masterful cooks to well up. So perhaps the real question is how do you cut an onion without crying? On this front, wild claims abound. We've heard that everything from chewing candy to lighting candles can help prevent the tears. Naturally, our Test Kitchen wanted to try them all. Follow along as Taste of Home's Test Cooks, Nick Iverson and Matt Hass, debunk the myths and ultimately settle on the best way to cut an onion without crying.

Method #1


"I put onions in the freezer for 15-20 minutes before I cut them, and I use a very sharp knife." —Elizabeth Bramkamp, Gig Harbor, WA Does it really work? The freezer method was a no-go. Notes from our Test Kitchen: Freezing the onion made it slightly more difficult to cut and didn't assuage any of its tear-producing fumes. Aside from getting our fingers frosty-freezy, this method didn't do much in the service of stopping those free-flowing tears. We recommend keeping onions at room temperature prior to chopping; however, it's perfectly fine to freeze onions for long-term storage.

FOOD.NDTV.COM Method #2


"I chew gum while breathing through my mouth instead of my nose. Sounds crazy, but it works!" —Allison Ochoa, Hays, KS Does it really work? Sadly, no. Notes from our Test Kitchen: Although enjoyable, chewing a stick of gum had no effect. (But it was fun to see our Test Cooks blowing bubbles in the kitchen.)

Method #3


"Drink a tall glass of water a few minutes before chopping onions. Dry eyes grab for any bit of liquid in the air." —Helen Nelander, Boulder Creek, CA Does it really work: Nope. Notes from our Test Kitchen: Drinking water didn't make any difference, but it did keep us hydrated in our warm kitchen!
Read More
Delicious Ways to Transition Your Favorite Comfort Foods to Summer

Delicious Ways to Transition Your Favorite Comfort Foods to Summer


The weather's getting warmer, but that doesn't mean you have to give up these comforting classics. Here's how to give them a summertime makeover.

Grilled cheese


Give your oozing grilled cheese a crunchy summer makeover by adding tomato, basil, and dill. Try this recipe by SuperHealthyKids. This is how one Food Network chef makes the perfect grilled cheese.

Mac and cheese


Everyone's cold-weather favorite? Mac and cheese. Make it a BBQ side dish by adding corn, zucchini, and queso. Try this summery recipe by TheFoodInMyBeard. You won't want to miss how Guy Fieri makes his favorite mac and cheese dish, either.

Hot tomato soup


While a frozen soup is arguably way different than hot soup, we say it's worth a try. Try this Bellalimento shot-glass version as an appetizer at your next hot-weather get-together. Not sold? These are the best and worst hot soups for weight loss.

Lasagna


No one wants a sweltering kitchen in the middle of the summer. But that doesn't mean you should have to sacrifice lasagna. Try this no-bake recipe by Taste of Home.
Read More
Finally! An Egg Substitute Vegans Will Love

Finally! An Egg Substitute Vegans Will Love


If you’re vegan or have ever tried cooking and especially baking without eggs, you know it’s a challenge. Which is why the promise of an egg substitute that’s entirely plant-based is blowing up the vegan internet. What is this magic ingredient that acts as the binding agent so many recipes need? It’s called aquafaba, and it’s actually the cooking liquid of beans or the liquid found in canned beans.
Apparently the consistency of the liquid resembles egg white, and can even be whipped into a fluffy meringue or used in baking decadent brownies. While you can use any type of bean liquid, vegan chefs find the liquid from low-sodium chickpeas work best in recipes. Food scientists haven’t quite figured out how aquafaba works as an egg substitute yet, but it likely has something to do with way the proteins and starches in aquafaba mimic the proteins in egg whites.
Bartenders are using aquafaba to create delicious creams and drink toppings. Vegans can now make meringues, macaroons, fudge, cakes, cookies and yes, finally a tasty mayo for sammies.
Wondering if your meringues or baked goods will smell like chick peas? No worries, the aroma disappears when aquafaba is whipped up or cooked. Same goes for taste—there is no residual garbanzo flavor.
If you’re not ready to try a recipe, but want to experiment and get the feel of working with aquafaba, start by whisking a couple of tablespoons of aquafaba and adding it to pancake batter to make them extra fluffy. There are plenty of vegan recipes online, but if you want to try it in some of your own favorite recipes, here is a egg substitution guide from Lauren Feingold, certified chef and co-founder of the Shanti Bar.
1 tablespoon aquafaba = 1 egg yolk
2 tablespoons aquafaba = 1 egg white
3 tablespoons aquafaba = 1 whole egg
Ready to try your hand at meringues? Try Lauren’s favorite recipe below:
Aquafaba Meringues (makes about 40)
Ingredients
1 15-ounce can of low-sodium or no-salt added chickpeas at room temperature
2/3 cup of coconut crystals (regular sugar is highly processed)
2 teaspoons almond extract
Preparation
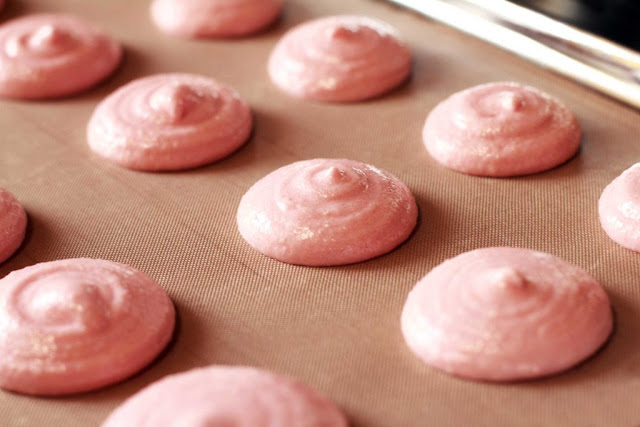
Heat oven to 250 degrees. Line two baking sheets with parchment paper. Drain the chickpeas, reserving the bean liquid (aquafaba). Save chickpeas for another use. Pour the aquafaba into the bowl of a standing mixer. Beat on high speed with the whisk attachment until stiff peaks form, about 15 minutes. Add the crystals, one heaping tablespoon at a time, and whisk until the mixture is glossy, then add the almond extract. Use a tablespoon to scoop the aquafaba mixture into mounds on the baking sheets. Bake for 1 1/2 to 2 hours, or until the meringues are dry and firm to the touch. Let meringues cool before serving. Meringues will keep in an airtight container for two to three days.
A little insider tip about meringues: It’s all in the whisk, so having a standing mixer or hand-held mixer with a whisk attachment is essential. (The beaters on a regular mixer move too quickly and allow the foam to set up, deflating the foam as fast as it creates it.) It takes a bit of time but the result will be sweet and crispy treats that you won’t be able to stop popping in your mouth.
Ready for more vegan cuisine? These tasty vegan breakfast ideas show that vegan eating is easier—and more delicious—than you might think.
Read More
This Is the Secret to Making Amazing DIY Microwave Popcorn

This Is the Secret to Making Amazing DIY Microwave Popcorn


Most of us have enjoyed the buttery goodness of microwave popcorn by simply unfolding a bag and pressing the “popcorn” button. Unfortunately, that buttery goodness can be a chemcialized butter flavor with additives and ingredients that less healthy than popping corn the old-fashioned way. Microwave bags aren’t much better either. When bags of microwave popcorn are heated, they emit fine and ultrafine particles that may come with health risks, Yifang Zhu, associate professor of the environmental health sciences department in UCLA Fielding School of Public Health, told Time. Exposure to high levels of the chemicals found in the bags has been linked to lung disease among those who work in popcorn manufacturing, Time reported.
We asked Sonali Ruder, MD, who is also a chef and blogger at thefoodiephysician.com how to make an amazing (and simple) bag of healthy microwave popcorn. Here’s the recipe she gave us.

Microwave Popcorn
Makes 1 serving
Ingredients:
1/4 cup popcorn kernels*
1/4 teaspoon oil
Pinch of salt
Yellow and white popcorn are a bit different in appearance but not in nutrition profiles. Yellow kernels are larger and take longer to cook. They also have a tougher hull and chewier. White is smaller, lighter, and crispier than yellow. Choose a non-GMO variety like Bob’s Red Mill.
Directions:
Toss the popcorn kernels in a small bowl with the oil and a pinch of salt. Pour the contents into a brown paper lunch bag. Fold the bag over a couple of times and then fold the corners in so that the bag doesn’t open during cooking.
Place the bag upright in the microwave and set the “cook” button for about 2 minutes. Turn off the microwave when the popping slows down to about two kernels between pops – otherwise, you risk scorching it.
Take the bag out of the microwave and open it carefully, watching out for hot steam. Pour the popcorn into a bowl and toss with seasonings of your choice. The heat will maximize the absorption of the seasoning’s flavor.
Personalize Your Popcorn
The beauty of this recipe is its so versatile. The basic recipe is tasty on its own but you can the toppings are limited only by your taste buds. What’s also fun about this recipe is that it makes an individual portion so everyone can make their own bag, the way they like it! Set out melted butter, olive oil or toasted sesame oil, spices, cheeses and dried fruit and have everyone sprinkle on their own combos. Here’s some ideas:
Savory Combos
  • Italian seasoning and Parmesan cheese
  • Rosemary and Parmesan
  • Crumbled seaweed crisps
  • Nutritional yeast (non-dairy, cheesy option) with cumin
  • Wassabi, low-salt soy sauce and sesame oil
  • Paprika, cumin and cayenne pepper
Sweet Combos
  • Cinnamon sugar
  • Melted peanut butter and mini-chocolate chips
  • Cocoa powder and coconut flakes
  • Dried fruit and mini-dark chocolate chips
Read More
How to Chill a Bottle of White Wine ASAP

How to Chill a Bottle of White Wine ASAP

White wine is best chilled, but sometimes chilling room temperature wine in a rush can be a challenge. With some everyday household items and a bit of advice from wine experts, there are ways to cool a bottle of white in less time than you think.


Need a cold glass of Riesling ASAP? Wine expert Mark Oldman, author of How to Drink Like a Billionaire: Mastering Wine With Joie de Vivre, says the first thing to do is fill a third of an ice bucket with ice. “Next, add water,” advises Oldman. “This oft-neglected step is done to create an ice bath that will submerge the bottle up to its neck. The water fills the air pockets between the cubes and pulls heat away from the wine faster than the ice alone. Mixing water with ice also makes it much easier to maneuver the wine in and out of the ice bucket.”
Then consider adding salt. “If possible, add a few fistfuls of salt to the mix,” Oldman continues. “Salt lowers the freezing temperature of water.”
Finally, he said, add your bottle and gently spin it at first and after a few minutes to ensure that all of the wine is exposed to the ice bath. (Here are more ideas to make your dinner party a success.)
“In 10 minutes, you wine will be chilled,” affirms Oldman.
Katie Owen, wine director of Winc, a direct-to-consumer online winery, said you can chill a bottle of white using a paper towel and your freezer. “I have found the quickest way to chill a white wine is to wet a paper towel, wrap the wet paper towel around the wine bottle, and then stick the wine bottle in the freezer,” Owen says, “In about 10 minutes the wine should be properly chilled.”
Another unexpected idea is to drop frozen grapes into your wine glass to cool the temperature of your wine, recommends an article on epicurious.com.
You Shouldn‘t Store White Wine in the Fridge
Although it may seem convenient to store white wine in the refrigerator, experts say to skip that idea. Charles Smith, a winemaker is Seattle, says what wine really wants is a dark place with no dramatic temperature shifts and no vibration. In most cases, your closet—or even a north-facing wall that doesn’t get direct sun—works just fine, he says.
“Temperature is, by far, the most important thing to consider when storing wine in your home, but most of us are doing it wrong. It shouldn’t be put in the fridge for longer than it needs to be.” Smith continues. “”Never keep your wine in the refrigerator. It seems really convenient because you want to keep it cool, but it only takes about 20 minutes in the freezer to do the same thing.”
If you have some advance notice, an hour or two in the fridge—or about 20 minutes in the freezer—should be all you need to cool your wine to the right temperature, he says.
Why White Wine Should Be Chilled (But Not Ice Cold)
Also, keep in mind you don’t want white wine too cold. “Good white wine shouldn’t be too cold, by the way,” says Keith Wallace, president and founder of the Wine School of Philadelphia and author of Corked & Forked: Four Seasons of Eats and Drinks. “It should be served slightly chilled. We chill white wine because it usually has a higher level of acidity, which makes white wine taste more like fresher fruit than a red wine. The chill accentuates that fresh fruit flavor.”
Higor Valle, sommelier at The Continental in Naples, Florida, says red and white wines have different chemical compositions that behave and respond differently under certain circumstances. ‘”The way we perceive them on nose and palate is also different, and temperature is one of the most important factors that will influence or vary this perception,” Valle says. “White wine has a higher proportion of interesting chemicals such as aldehydes, esters, and terpenes that are easier to detect at lower temperature. Aromatic varietals such as Riesling and Sauvignon Blanc will display their signature notes better when chilled [fruit, organic, and non-organic notes: think of green apples, citrus, and slate on Rieslings and grapefruit, fresh herb, and chalk on sauvignon blanc] and it will also accentuate the acid, enhancing the freshness and crisp note on these wines. Around 46 degrees F would be a recommended temperature.”
Read More
What’s All the Hype About Bone Broth?

What’s All the Hype About Bone Broth?

Bone broth has garnered lots of attention recently for being a superfood, but what's all the hype really about? Are there really any health benefits of bone broth? We investigate.


Chances are you’ve heard about bone broth and its many benefits. Recipes, articles, and even cookbooks have been popping up to celebrate what looks like a new (and at the same time very old) miracle tonic. With sports stars like Kobe Bryant singing its praises, it’s easy to get caught up in all the bone broth hype. But is there any truth behind all of these reported bone broth benefits?
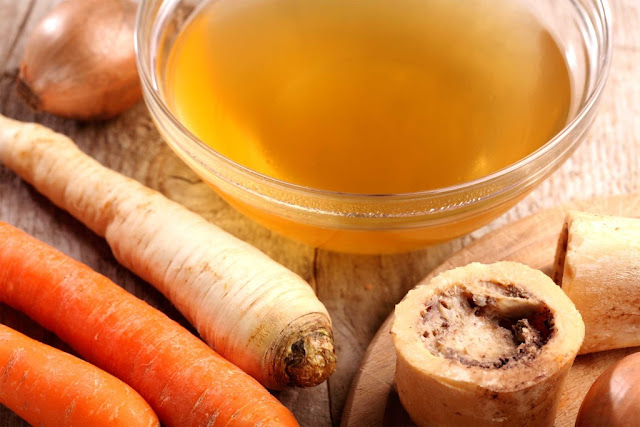
First of all you may be wondering; what is bone broth, anyway? Explained very basically, bone broth is a type of stock made from bones which have been boiled for a few hours, usually with other flavorings such as salt and pepper and onions or carrots. Technically, bone broth can be made from any bones, but it’s generally thought that using the bones from healthy, organically-reared animals is better.
While bone broth might seem like the trendiest superfood trend out there, it’s actually far from anything new. (Related: Here’s how to make these superfoods even healthier.) Bone broth has been purported to have be around for a very long time. Sally Fallon Morell, co-author of the book Nourishing Broth, stated that the use of bone broth actually goes all the way back to Stone Age cooking, and it’s even been suggested that Hippocrates, the ancient Greek physician, prescribed bone broth for patients experiencing joint pain.
What are the benefits of bone broth?
Bone broth has been purported to have many health benefits. It is rich in phosphorous, magnesium, and calcium, so it is great for promoting healthy teeth and bones, and is also said to have immune-system boosting properties. Bone broth is high in collagen, so it is also believed to promote healthy joints, skin, and hair. It’s even been reported to help improve the appearance of cellulite as its high collagen content helps to smooth connective tissues and reduce the appearance of ‘orange peel’ skin, although more research needs to be done on this topic.
Another of the many bone broth benefits is the fact that you can make it at home easily. Home-made bone broth is different from the prepackaged broth and stock you can buy at the grocery store, because it’s lower in sodium and is packed full of nutrients. So if you want to incorporate this nutrient-rich liquid into your diet, simply roast healthy animal bones (you can use organic poultry, beef, or fish) and then boil together with herbs and spices to make a stock. Simmer the broth for a few hours in order to give enough time for the bones to break down and release all the nutrient-rich goodness, then enjoy!

Read More